Creekstone Outdoor Living Luxurious Outdoor Kitchen

Setting Up A Luxurious Outdoor Kitchen

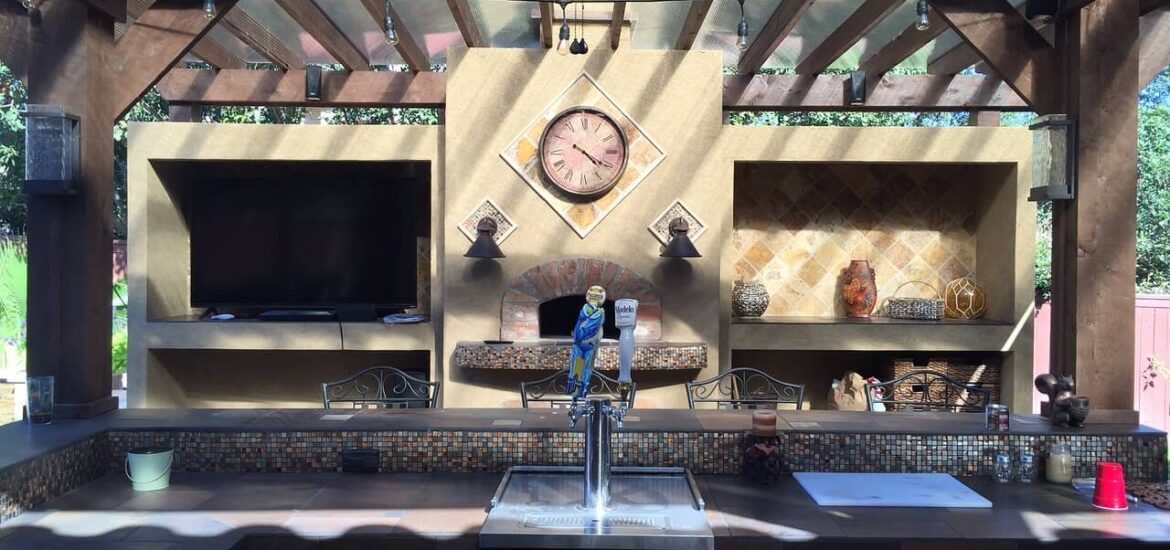
According to reports, your kitchen is the first thing a prospective buyer will see to judge the overall condition of your house. It’s clear that you need to invest in your kitchen if you wish to have a luxurious house. And outdoor kitchens are turning out to be more valuable for a home than ever.

Investing in a kitchen is important for more than one reason. Not only does it help you market your property better, but it also adds a look to your house. Let’s not forget that we spend around 1 hour and 17 minutes eating and drinking each day. Plus an extra hour doing food preparation and cleanup. That’s a lot of time. Hence the need to work on your kitchen and turn it into a luxurious place to be.

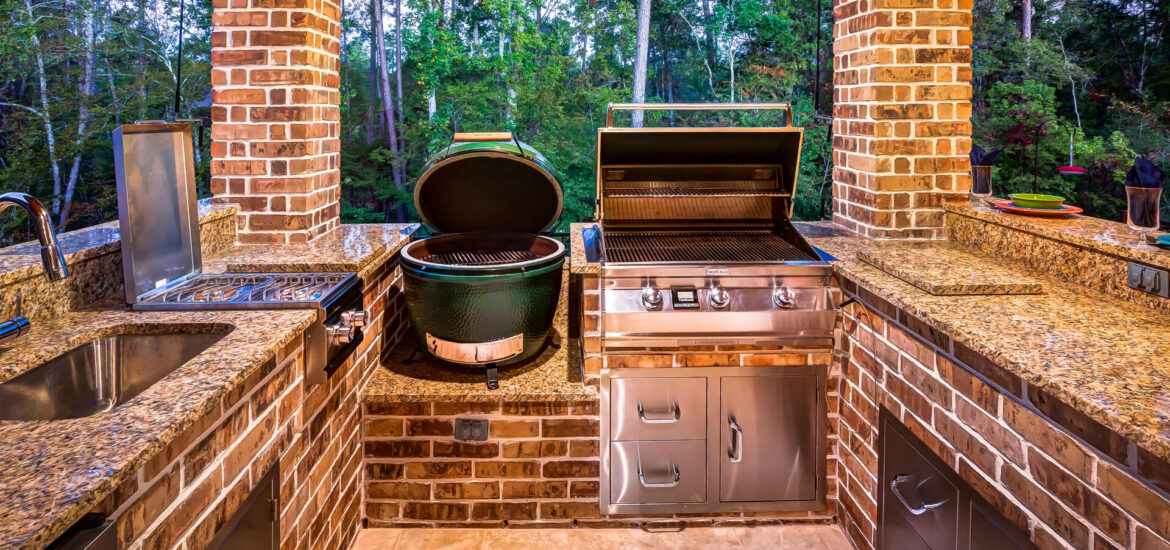
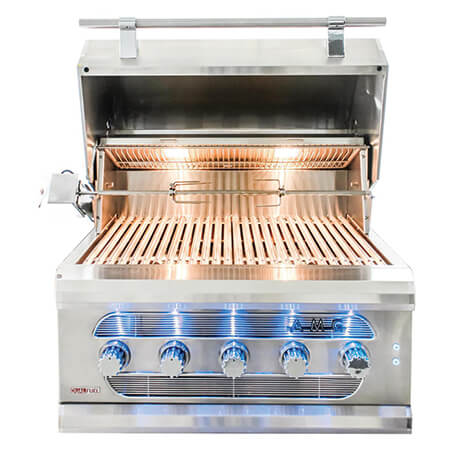
Enter the era of outdoor kitchens. They are more vibrant and fun. Staying in your home even on a bright sunny day can be boring, so why not take your kitchen outside where you can prepare barbecues under the warm smiling sky. An outdoor kitchen also gives you much more space to fit a bigger family and everyone can have a gala time together. You also save time and energy that is wasted in going inside to grab the things that you need.

Sold on the idea of having your own outdoor kitchen? Let’s talk about tips on how to get one!

Usage Of Outdoor Kitchens

Custom Outdoor Kitchen with RCS Grill, Double Side burner, Refrigerator and SinkThe first thing you need to decide is the location. You can set up your kitchen in the backyard or front yard, or even on your terrace. Carefully plan the location so that you have no issues once everything is in place.

According to experts, people often end up wasting money on things they do not need. They step out to purchase and waste money on things that are not really useful for their situation. These include side burners and other such accessories. To avoid this mistake, make sure you know how you’ll be using your kitchen and for what purpose.

In order to set up a luxurious outdoor kitchen, you must know your requirements. Does your climate allow you to step outside and enjoy yourself, or are there only a few times throughout the year that you have a barbecue under the stars? Setting up an outdoor kitchen with a lot of accessories for events that you celebrate a few times a year doesn’t make sense.

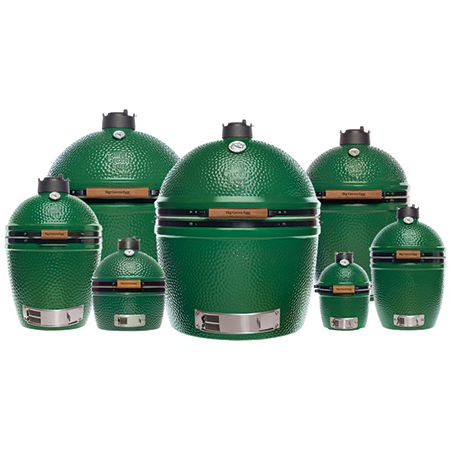
If you want to have an outdoor kitchen just for cooking and still rely on your indoor kitchen most of the time, then a simple one will suit your needs. All you’ll need is a basic counter with some space for preparing food. However, if you’re planning to spend most of the time cooking and doing other chores outside, then it would be better to have vast space to prepare. You’ll also want a sink, refrigerator, cabinets and eating area or bar to entertain guests.

Cost

After knowing how you’d be using the space, the next thing to consider is your budget. We understand that your budget is limited, so make sure to spend wisely.

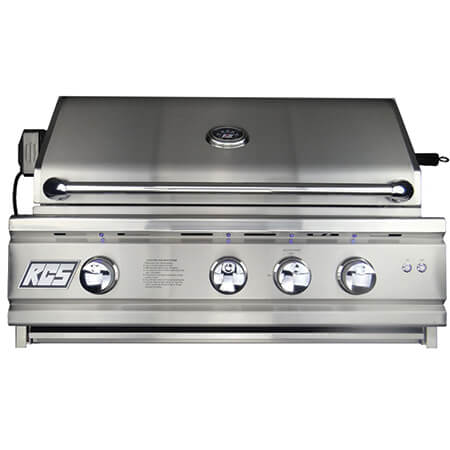
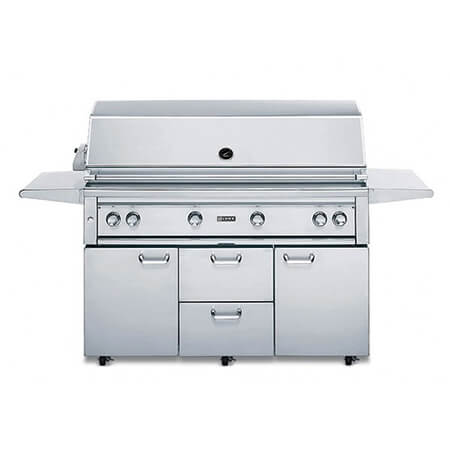
A prefab outdoor kitchen would cost you around $5,000. They come with a barbecue grill with space to keep your items inside. However, experts can help you get your desired kitchen for a budget much lower than that.

A 10-foot-long island with a spot for a barbecue grill comes under the budget of about $10,000. And if you wish to add more accessories, such as a refrigerator and midlevel grill, then get ready to spend another $5,000. However, a patio is not included in this amount and setting up a patio or a spot to keep your kitchen is still a need and its cost depends on the size of the patio.

If you’re an outdoor kitchen lover and would love to get your outdoor kitchen custom-made, then can expect to budget anywhere from $25,000 and $100,000. We know this sounds a lot, so make sure to do some budgeting. Also, remember that the cost depends on the items you purchase.

Having an outdoor kitchen set up close to the house can save you from the costs of pulling water, gas and electrical wires from afar. The cost mentioned above includes the cost for gas and electrical line. The overall cost may differ, however a gas pipe would cost around $12 per foot and electric wire would cost about $8 per foot.

But do not let the cost scare you. You can get it all done for as low as $1,000. All you need is the right person to do the job for you. The more amenities you need, the more you’ll be paying.

Hiring A pro Or DIY?

Home owners with DIY skills might have the ability to make an enclosed grill with counter spaces themselves. Nonetheless, some parts of an outdoor kitchen, particularly when it comes to managing gas, water and electrical lines, require an expert. It could be better to search for landscape designers and contractors who knows the drill when it comes to outdoor kitchens.

You may need permission before you build an outdoor kitchen, based on where you live. It is wise to inquire before you begin any sort of construction. Again, a professional outdoor living contractors knows what permits might be necessary in your area and may include permitting in an estimate.

Time Period

The duration it takes to complete a project depends on a lot of factors, most importantly the work needed. Brick work, a grill and an outdoor refrigerator could take fewer than seven days. However, if your outdoor kitchen includes features such as a shade structure and patio, then it may take a few weeks as it also requires applying for permits to build the structures.

A lot of people begin thinking about adding an outdoor kitchen in spring, which makes this a busy time for contractors.

Layout and Arrangement

After figuring out your need and costs, the next step involves selecting a location and arranging your outdoor kitchen accordingly. If you have the budget and you’ll be utilizing the kitchen more frequently for entertainment purposes then it doesn’t have to be right next to the house.

For the cook, set up a bar or a counter with seating and a feasting table available close by. But keep in mind that the chef needs space to stroll about. Also take care of the wind so that the guests don’t end up in smoke from the grill.

When it comes to an outdoor kitchen, the options are endless and the sky’s the limit. You may just install a few chairs and counter with a stove and get going, or go full blown with other accessories. See what your budget allows and what you’re requirements are and give it a go.

Creekstone Outdoor Living Minimalist Living Room

Tips to Make Your Small Living Room Look Bigger

Having a small living room can be troublesome. You don’t know where to place your new furniture or how to accommodate guests. While increasing the real floor area may not be possible, clever planning can make your living room appear bigger than it actually is, while allowing you to use the space in a better manner.

Here are 10 tips that can help you capitalize on an immensely small living room.

Blending Rooms

Creekstone Outdoor Living Custom Room Inspiration
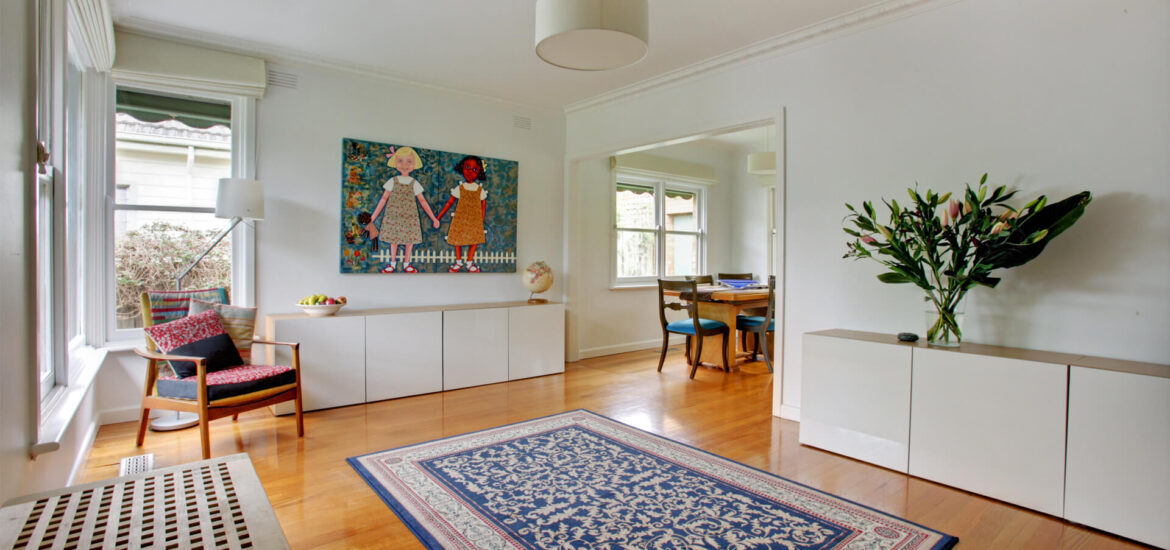
Blend your living room with your other rooms to make it appear bigger. This can be done by merging doors and walls of adjacent rooms into your living room.

Keep the example of a kitchen in mind. If you have your kitchen right next to the living room, but it’s separated by a window and wall, you can remove this barrier and go for an open kitchen. This way your kitchen would be a part of the living room making it look bigger. Plus, you will also find it easy to cater to people, especially when you are hosting an event at your place.

You can also blend your living room with your outdoor living space. Installing a patio door invites guests to enjoy both your indoors and outdoors spaces. Your outdoor space could be a simple sitting area with table and chairs or a complete outdoor kitchen to enhance your home’s value and add a larger area for entertaining.

Custom Made Furniture And Shelves

Creekstone Outdoor Living Custom Bench InspirationKeep away from large and heavy furniture. It will occupy a lot of space and make the room look more smaller. Rather, go for, adjustable furniture, like couches. For instance, a couch having valuable storage space available underneath can remove the need to have drawers and more furniture in the room.

If your budget doesn’t allow you to purchase a custom couch, get innovative and consider a rollaway drawer with sections and place it under the couch. Installing vertical creative brackets on wall will also free up a lot of floor space.

The idea is to use as little furniture as possible. Having nothing in your living room but a place to sit can be enough at times. The free space can be used to accommodate guests. Cluttered rooms look smaller than they are, so do away with the items that you do not need.

Creative Arrangement

The arrangement of your furniture says a lot. For example, if you place your couch in the middle of the room, the room would appear very small as there wouldn’t be enough space to walk. Conversely, if you place your couch in a corner, the whole room will be accessible, making it look bigger. We tend to gauge a room’s size based on the amount of empty space that we see.

You should also use your furniture to create different zones in your living room. For example, a couch can be placed in front of a TV to make it look like the ‘TV area’ and a work table can be placed in another corner to make it looks like the ‘work area.’

In addition to this, you can also enhance the design of the room by placing different lighting in each zone. The TV area can be highlighted by hanging a light above, and a lamp can be placed next to the study table to highlight the work zone.

Multi-Purpose Items

Use items that serve multiple purpose so that you do not overcrowd the room. For instance, a table used as a work desk and eating area or a pull out couch bed can be a good choice.

Rather than having floating shelves, select gliding drawers. They fill a similar need and give you additional compartments for necessities as well. These days, concept furniture is in. You can get couches that can turn into beds and even into tables. While such an investment requires a good amount of money, it can be very useful in the long run.

Tones On The Walls

Utilizing white or paler tones can improve the overall view of your room. Use the same color for the wall and the trim as it would make the room look bigger. When your walls match the color of your trim, your eyes are attracted to the ceiling, which makes the room appear bigger.

However, you can also use darker hues such as charcoal dim. These shades can make your living space gorgeously welcoming. But keep in mind to get contrasting furniture and pale floor covering if you’re using darker shades.

Use Rugs That Cover A Large Area

Use rugs that cover your entire seating area. It makes it appear as if you have an extra amount of space on the floor. In addition to this, rugs also look very attractive. However, make sure to use large sized rugs as a small rug would not serve the same purpose.

Eye Catching Features in One Corner

Concentrate on one corner of the room and fill it with attractive furniture and features that appeal to visitors. You can use special lighting and fixtures to give it a good look, but make sure the space doesn’t look congested.

If you have a section highlighted, most visitors would concentrate on it, neglecting other zones which you can leave empty to make your room look spacious.

It is necessary for a smaller room to be decently decorated because we spend a lot of time in the living room. Pick customizable decor and adjust it according to the available space.

We hope these simple yet effective tips will help you make your living room look bigger. The key lies in using little furniture, having empty space and using a clever mix of lights and colors to give your room a new look that makes it look bigger than it actually is.

Covered Patio with Summer Kitchen by Creekstone Outdoor Living

Top 5 Grills for Your Outdoor Kitchen

As the primary element in an outdoor kitchen, selecting the best grill for your lifestyle and cooking space is an important decision.

Whether you’re designing a complete outdoor kitchen and prefer a built-in grill to compliment the other kitchen elements or are looking to upgrade the cart grill in an existing outdoor living space, we have some suggestions to get you started.

Big Green Egg

Big Green Egg Grill Family

Not only is a Big Green Egg versatile functioning as a grill, oven and smoker all in one, it’s stylish, too! You’re sure to get plenty of compliments simply on the look of this ceramic kamado-style charcoal grill.

The Big Green Egg heats up hot for the perfect sear on steaks, pork, burgers and brats, and its two dampers adjust the temperature when grilling fish, seafood and vegetables. Lower the temperature a little more and the Big Green Egg becomes a smoker for your choice of meats. With the addition of a pizza and baking stone, the Big Green Egg transforms once again into an oven for pizzas, breads and desserts.

Since the Big Green Egg is available in seven sizes, it is an excellent choice for any outdoor kitchen as it can fit in a variety of spaces. It can be used as a tabletop grill, raised to the perfect height with a Big Green Egg Nest and set in a Custom Cooking Island. Or your custom outdoor kitchen countertop can be designed specifically to fit a Big Green Egg.

Fire Magic Aurora series

FireMagic Aurora 600 Built in Grill - Open View

Looking for a gas grill that heats up fast and stays hot? Look no further than the Fire Magic Aurora series grill. With more BTU’s per square inch and the largest cooking space compared to other grills the same size, there’s no messing around when it comes to meal preparation.

Its cast stainless steel “E” burners are guaranteed for life and the stainless steel flavor grids are engineered for durability and even heat distribution.

Even novice outdoor chefs will find the Fire Magic Aurora easy to use with its Advanced Hot Surface Ignition and convenient built-in interior lights.

Add on the optional stainless steel rotisserie back burner and rotisserie kit and this conventional grill is geared up for roasting and serious barbecuing.

RCS Built-In Cutless Series

RCS Pro Series Grill with Rear Burner - Ron30s

The RCS Cutless Series grill features 840 square inches of cooking space, three cast stainless steel burners, grilling zone separators and stainless steel flame tamers.

When you fire up your RCS grill, don’t hesitate to invite your extended family or the entire neighborhood for a meal. Available as a built-in, this RCS grill will fit snuggly in a custom outdoor kitchen countertop.

Lynx Freestanding Grill

Lynx Professional freestanding Grill Prosear 2 Burner and Rotisserie 54 inch

If a cart grill is a better fit for your outdoor kitchen, the Lynx Freestanding Grill could be just what you’re looking for. It comes equipped with three cast brass burners, a ProSear 2 Burner, a dual position rotisserie and premium smoker box. The possibilities with this grill are truly endless.

Throw some steaks over the ProSear 2 Burner to sear, truss a chicken and secure it on the rotisserie spit, or select your favorite cut of meat to slow cook in the smoker box. Your guest won’t be disappointed when the meal comes off the grill.

American Muscle Grill

American Muscle 36 inch Grill - Open Lights

Have you dreamed about owning a grill designed after muscle car? Well you are now! Available as a built-in or cart, the American Muscle Grill is unmatched in function and design. From the front, it honestly resembles a 1968 Shelby GT 350 Mustang. Now that’s sure to turn some heads!

And you can cook with pretty much any fuel on the market – charcoal, lump charcoal, wood chunks, natural gas, liquid propane and pellets fuels. Plus its resourceful Multi-Fuel Tray System makes it possible to grill using any combination of solid fuels. Let your imagination soar with this multifaceted grill!